The Ultimate Setup Guide for Your Canon Eos C50
The Canon EOS C50 represents a significant milestone in the evolution of the Cinema EOS lineup. Designed to bridge the gap between high-end mirrorless photography and professional cinema production, this compact powerhouse brings the legendary Canon color science and reliable autofocus to a form factor that appeals to independent filmmakers, documentary shooters, and high-volume content creators. Setting up a cinema camera is markedly different from configuring a standard DSLR or mirrorless body. While a photography camera is often ready to go out of the box with a few settings tweaks, a cinema camera like the EOS C50 requires a systematic approach to rigging, internal menu configuration, and media management to truly unlock its potential. This guide provides a comprehensive roadmap for transforming a fresh C50 into a production-ready tool capable of handling demanding professional environments.
Detailed Product Analysis: The C50 Value Proposition
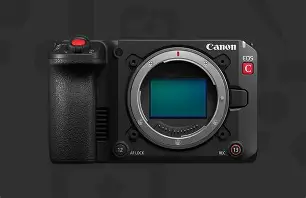
At the heart of the Canon EOS C50 is a Super 35mm CMOS sensor that shares much of its DNA with the more expensive C70 and C300 Mark III. This sensor utilizes Canon’s Dual Gain Output (DGO) technology, which captures two different gain levels for every pixel to create an image with high dynamic range and low noise. For the end user, this means the ability to shoot in challenging lighting conditions—such as high-contrast outdoor scenes or dimly lit interiors—without losing detail in the highlights or suffering from excessive grain in the shadows. The C50 is specifically engineered for those who need a "B-cam" for larger productions or a primary "A-cam" that remains portable enough for gimbal work and solo operation.
One of the most praised aspects of the C50 is its integration of the RF mount. This short flange distance allows for the use of Canon’s cutting-edge RF lenses, which offer superior sharpness and faster communication with the body. However, through the use of adapters, the C50 remains compatible with the vast library of EF glass that has defined the industry for decades. The inclusion of built-in ND filters is another professional touchpoint that separates the C50 from the EOS R series. Having mechanical ND filters allows cinematographers to keep their shutter angle at 180 degrees even in bright sunlight, maintaining natural motion blur without the need for external matte boxes or screw-on filters that can introduce color shifts.
From a workflow perspective, the C50 supports various recording formats including XF-AVC and MP4, offering flexibility between high-bitrate professional delivery and lightweight files for quick turnarounds. The implementation of Dual Pixel CMOS AF II is perhaps the single most important feature for the modern solo shooter. The ability to track a subject’s eye or face with surgical precision allows a single operator to manage lighting, sound, and composition without the constant anxiety of missing focus on a critical take.
Pros and Cons of the Canon EOS C50
- Pro: Dual Gain Output (DGO) Sensor: Provides over 16 stops of dynamic range, mimicking the look and feel of high-end film stock.
- Pro: Built-in Mechanical ND Filters: Offers 2, 4, and 6 stops of light reduction, essential for maintaining consistent depth of field.
- Pro: Professional Audio Inputs: Includes mini-XLR terminals for high-quality audio recording directly to the camera, eliminating the need for external recorders in many scenarios.
- Pro: Compact and Lightweight: Ideal for long days on a gimbal or handheld shooting in tight spaces where a larger cinema rig would be cumbersome.
- Pro: RF Mount Versatility: Direct access to the best modern optics and seamless adaptation of legacy EF lenses via the EF-EOS R 0.71x Mount Adapter.
- Con: Fixed LCD Screen: Unlike some competitors, the screen does not fully articulate in all directions, which can make certain high or low angles difficult without an external monitor.
- Con: Media Limitations: While SD cards are affordable and widely available, the Lack of CFexpress Type B slots means internal RAW recording bitrates are more limited than higher-tier models.
- Con: Power Consumption: The DGO sensor and advanced autofocus processing can drain BP-A30 batteries relatively quickly during intensive 4K 60p sessions.
Core Differences: C50 vs. Competitors
When choosing a cinema camera, it is vital to understand how the C50 stacks up against its peers in the sub-professional and professional categories. The following table highlights the key specifications that professional buyers typically prioritize when evaluating their setup needs.
| Feature | Canon EOS C50 | Canon EOS C70 | Sony FX3 |
|---|---|---|---|
| Sensor Type | Super 35mm DGO CMOS | Super 35mm DGO CMOS | Full Frame CMOS |
| Mount | RF Mount | RF Mount | E-Mount |
| Internal ND | 2, 4, 6 Stops | 2, 4, 6, 8, 10 Stops | None |
| Audio | 2x Mini-XLR / 3.5mm | 2x Mini-XLR / 3.5mm | XLR Handle (2x XLR) |
| Max Resolution | 4K up to 120p | 4K up to 120p | 4K up to 120p |
| Dynamic Range | 16+ Stops (DGO) | 16+ Stops (DGO) | 15 Stops |
Phase 1: Initial Hardware Configuration
The setup process begins with physical assembly. Because the C50 is a modular cinema camera, the way you "cage" the camera will dictate your efficiency on set. For most users, adding a dedicated cage is the first step. This provides multiple 1/4"-20 and 3/8"-16 mounting points for accessories like top handles, monitors, and wireless transmitters. When mounting the top handle, ensure it is balanced over the center of gravity. If you are using heavy RF zoom lenses, the camera becomes front-heavy; a top handle with a sliding mechanism allows you to adjust the grip point to maintain balance while handheld.
Battery management is the next priority. The C50 uses Canon BP-A series batteries. For a standard eight-hour shoot day, it is recommended to have at least three BP-A60 batteries if you are shooting 4K high-frame-rate content. If you are rigging the camera for a studio environment, consider using the DC input with an AC adapter or a V-mount battery plate. V-mount batteries not only provide significantly longer run times but also allow you to power peripheral devices like an external monitor and a wireless follow focus from a single power source, simplifying your cable management.
Audio setup on the C50 is remarkably robust for its size. The camera features two mini-XLR ports. To use standard professional microphones, you will need mini-XLR to standard XLR adapter cables. When setting up your audio, mount a shotgun microphone on the cold shoe of your top handle and plug it into Channel 1. For interviews, use Channel 2 for a wireless lavalier receiver. Inside the menu, ensure you have set the inputs to "Mic +48V" if using a condenser microphone, or "Line" if taking a feed from a mixer.
Looking for the best Cameras & Photography deals on Amazon?
Browse Now →Phase 2: Mastering the Menu System and Custom Buttons
The Canon Cinema EOS menu is vastly different from the standard Canon "Red" menu found on photography cameras. It is functional and deep, requiring a logical approach to configuration. The first setting every user should address is the Recording Mode. For the highest quality without moving to external recorders, select XF-AVC YCC 422 10-bit. This format provides enough data for professional color grading, especially when paired with Canon Log 2 or Canon Log 3.
Assigning custom buttons is where the C50 truly becomes an extension of the operator. The camera has several numbered buttons that can be mapped to almost any function. A professional setup typically follows this logic:
- Button 1: Peaking. Quick access to focus assistance is vital when not using autofocus.
- Button 2: Zebra. Essential for checking highlight exposure on skins or bright backgrounds.
- Button 3: False Color. Many cinematographers prefer false color over zebras as it provides a complete map of exposure values across the entire frame.
- Button 4: Magnification. Critical for double-checking focus before hitting record.
- Button 5: One-Shot AF. Allows for a quick focus pull even when in manual mode.
Another crucial menu setting is the "Monitoring LUT" (Look Up Table). When shooting in C-Log 2 or C-Log 3, the image on the screen appears flat and desaturated. This makes it difficult to judge exposure and color accurately. By applying a "709" LUT to the LCD but not the recording, you can see what the final image will look like while still capturing the maximum dynamic range for the edit. Ensure that "LUT" is toggled "On" for the LCD but "Off" for the Recording to avoid baking in the look.
Phase 3: Lens Selection and Mount Calibration
The C50's RF mount is its greatest asset. When using native RF lenses, you benefit from the best image stabilization (IS) performance. The camera can coordinate its electronic IS with the lens's optical IS to create remarkably smooth handheld footage. For a versatile setup, the RF 24-70mm f/2.8L is the "industry standard" choice, providing a useful focal range for everything from wide establishing shots to medium close-ups.
However, if you are moving to the C50 from an older system or want a more "cinematic" look, the EF-EOS R 0.71x Mount Adapter is a must-buy. This is not just a simple spacer; it is a "Speed Booster" that uses optics to condense the light from a full-frame lens onto the Super 35mm sensor. This effectively gives you a one-stop increase in light and maintains the original full-frame field of view of your EF glass. When setting this up, ensure you have updated the firmware of the adapter to ensure full metadata communication and autofocus support for your specific EF lenses.
Buying Guide: Who is the C50 For?
Choosing the C50 over other cameras in the Canon lineup or from competitors like Sony and Blackmagic depends heavily on your specific business model and artistic needs. Buyers should consider the following factors before committing to this ecosystem.
The Documentary and Corporate Filmmaker: If your work involves long interviews, run-and-gun b-roll, and unpredictable lighting, the C50 is arguably the best tool in its price bracket. The built-in ND filters and superior autofocus mean you spend less time fussing with the camera and more time focusing on the story. The dual SD card slots allow for "Relay Recording" (switching cards automatically when one is full) or "Simultaneous Recording" (creating an instant backup), which is a non-negotiable requirement for many corporate clients.
Discover deals on Cameras & Photography — updated daily.
View Offers →The Independent Cinematographer: If you are focused on narrative work and short films, you will value the DGO sensor. The way the C50 handles skin tones is legendary; Canon’s "color science" often requires less correction in post-production compared to the more "clinical" look of Sony or the "warm" bias of older Blackmagic sensors. While it lacks the internal RAW recording of the C300 Mark III, the 10-bit 4:2:2 files are more than enough for a high-end color grade in DaVinci Resolve.
The Content Creator and YouTuber: While the C50 may seem like overkill for a desktop setup, its reliability makes it an excellent investment for those running professional channels. The ability to record for hours without overheating—thanks to an internal fan system—solves one of the biggest pain points of mirrorless cameras like the EOS R5 or R6. Furthermore, the XLR audio inputs simplify the "talking head" setup by allowing a high-quality mic to be plugged directly into the camera rather than synced later from a computer.
Advanced Post-Production Integration
Setup doesn't end when the camera is turned off. To get the most out of the C50, you must prepare your post-production pipeline. Canon provides "Cinema RAW Development" software and specific plugins for Adobe Premiere Pro and Apple Final Cut Pro. Even if you aren't shooting RAW, using Canon’s official LUTs for conversion from C-Log to Rec.709 is the best way to ensure highlight retention and accurate skin tones.
For high-turnaround environments, consider setting up a "Custom Picture" profile in-camera. This allows you to tweak the gamma, black pedestal, and color matrix to create a "baked-in" look that requires zero grading. This is particularly useful for live events or fast-paced news cycles where the footage needs to go from the SD card to the internet in minutes. However, for any project where quality is the priority, always stick to C-Log 2 for maximum dynamic range or C-Log 3 for a slightly easier grading experience with a bit less shadow detail.
Conclusion
The Canon EOS C50 is a sophisticated instrument that rewards those who take the time to understand its nuances. By following a structured setup process—starting with a robust cage and power solution, moving through a deliberate custom button mapping, and ending with a calibrated lens and post-production workflow—you can ensure that the camera becomes a transparent part of your creative process. It is a tool designed to remove the technical barriers between a filmmaker’s vision and the final image. Whether it is used for a high-budget commercial or a solo-operated documentary, the C50 provides the stability, image quality, and reliability that have made the Cinema EOS line a staple of the modern film industry. As you grow with the camera, you will find that its deep menu system and physical ergonomics allow for a level of customization that few other cameras in this class can match, making it a worthy centerpiece for any professional production kit.